Frigidaire Stacked Washer Dryer Manual: Troubleshooting & Repair
Navigating common issues with your Frigidaire stacked unit is now easier! This guide offers solutions for problems like spinning failures, error codes, and unusual noises․
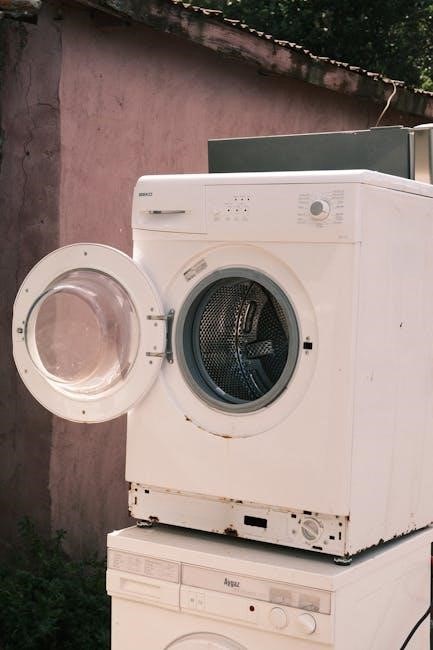
Understanding Your Frigidaire Stacked Unit
Frigidaire stacked laundry centers combine washing and drying into a single, space-saving appliance․ These units are designed for convenience, but understanding their operation is key to efficient use and troubleshooting․ The washer and dryer share some components, like the water supply and electrical connection, but function independently during cycles․
Proper installation, including leveling, is crucial for optimal performance․ Overloading either the washer or dryer can lead to issues․ Familiarize yourself with the control panel and cycle options․ Regularly cleaning the lint filter is essential for dryer efficiency and safety․ Knowing the basics of how your Frigidaire unit works will empower you to address minor problems and prevent more significant repairs․ Refer to the full manual for detailed instructions and safety guidelines․
Model Number Identification & Location
Locating your Frigidaire stacked unit’s model number is vital for accessing the correct documentation and ordering replacement parts․ The model number is typically found on a label affixed to the appliance․ Check inside the washer door jamb, or on the back of the unit – you may need to carefully pull the machine away from the wall․
The label will display a series of letters and numbers, such as FFLG4033QT0․ This unique identifier specifies the exact configuration of your model․ Having this number readily available streamlines troubleshooting, ensures compatibility with repair guides, and simplifies the process of obtaining assistance from Frigidaire’s support team or authorized service centers․
Accessing the Technical Service Manual
The Frigidaire technical service manual is an invaluable resource for detailed repair information․ It contains schematics, diagnostic flowcharts, and parts lists essential for advanced troubleshooting․ Online resources and forums often point to this manual as a key to resolving complex issues․
Specifically, page 116 details running diagnostic tests, while page 118 provides a comprehensive decoding of error codes․ Accessing this manual empowers informed self-repair, though professional assistance is recommended for intricate repairs․ Remember to search using your specific model number (e․g;, FFLG4033QT0) to ensure you obtain the correct documentation for your Frigidaire stacked unit․

Common Problems & Solutions
Addressing typical Frigidaire issues is straightforward! We’ll cover problems like spin cycle failures, beeping errors, drum malfunctions, and unusual noises․
Washer Fills, Agitates, But Won’t Spin
If your Frigidaire washer fills with water, agitates clothing effectively, but refuses to enter the spin cycle, several components require investigation․ First, check the water supply faucets to ensure they are fully opened, allowing adequate water flow for proper operation․ Next, verify the unit is perfectly level; an uneven machine can trigger safety mechanisms preventing the spin cycle․
A frequently encountered culprit is a faulty lid switch․ This safety feature prevents spinning when the lid is open, and a malfunctioning switch can falsely indicate the lid remains open․ Inspect the drive belt for wear or breakage; a damaged belt won’t transmit power to the spin basket․ Finally, consider the washer control board, as issues there can disrupt the spin cycle command․ Replacing the lid switch and testing its functionality is a common first step․
Checking Water Supply Faucets
Ensuring adequate water supply is the initial step when troubleshooting a washer that won’t fill or spin correctly․ Locate both the hot and cold water supply faucets connected to your Frigidaire stacked unit․ Verify that both faucets are completely turned on, allowing unrestricted water flow to the appliance․
Sometimes, faucets can be partially closed, especially if recent plumbing work has been performed․ Inspect the hoses connected to the faucets for any kinks or obstructions that might restrict water passage․ If the water pressure in your home is generally low, this could also contribute to the problem․ A simple test is to briefly disconnect the hoses and check the water flow directly from the faucets․
Ensuring Unit Leveling
Proper leveling is crucial for optimal washer performance, preventing excessive vibration and ensuring correct operation, especially during the spin cycle․ Use a bubble level to check the unit’s stability on both the front-to-back and side-to-side axes․ Adjustable feet are located at the bottom of the washer; rotate these feet to raise or lower each corner until the unit is perfectly level․
An unlevel washer can cause significant noise, instability, and even prevent the lid switch from functioning correctly, hindering the spin cycle․ Tighten the locking nuts on the adjustable feet after leveling to prevent them from shifting during operation․ Re-check the leveling after making adjustments and before resuming use․
3 Beeps & Stuck Cycle (Model FFLG4033QT0)
The three beeps on your FFLG4033QT0 model often indicate an error requiring diagnostic attention․ This frequently signals issues with the washer control board or the lid switch assembly․ Consult page 118 of the technical service manual to decipher the last five error codes stored, providing clues to the root cause․
If the lid switch is suspect, replacement and thorough testing are recommended․ A faulty switch prevents the washer from recognizing a closed lid, halting the cycle․ Run diagnostic tests as outlined on page 116 to further pinpoint the problem․ Replacing the washer control board may also resolve the issue, but confirm error codes first․
Washer Control Board Issues
A malfunctioning washer control board can manifest in various ways, including a stuck cycle accompanied by three beeps on the FFLG4033QT0 model․ This board is the central nervous system, managing all washer functions․ If error codes point to internal control failures, replacement is often necessary․
Before replacing, carefully inspect the board for any visible damage, such as burnt components or swollen capacitors; Refer to the technical service manual for specific testing procedures and voltage readings․ Ensure the power is completely disconnected before handling the control board․ A new board should resolve issues if the lid switch tests functional, and error codes consistently implicate the control system․
Lid Switch Replacement & Testing
A faulty lid switch is a frequent culprit when a Frigidaire washer fills and agitates but won’t spin․ This switch prevents operation when the lid is open, ensuring safety․ To replace, disconnect power and locate the switch – typically near the lid hinge․ Disconnect the wiring harness and install the new switch․
Testing is crucial! Use a multimeter to check for continuity when the lid is closed and open․ A lack of continuity when closed indicates a bad switch․ Consult the service manual (page 118) for specific voltage requirements․ If the switch tests good, the issue likely lies elsewhere, such as the control board or motor․
Dryer Drum Not Turning
If your Frigidaire dryer drum isn’t rotating, several factors could be at play․ First, ensure the dryer isn’t overloaded, as this strains the motor․ A broken drive belt is a common cause; inspect it for wear or breakage and replace if necessary․ The motor itself could be faulty, requiring professional diagnosis․
Also, check the drum rollers or glides for smooth operation․ Friction can prevent rotation․ Disconnect power before any inspection! Finally, a blocked vent can cause overheating and trigger a safety shut-off, preventing drum movement․ Address any vent obstructions immediately for optimal performance․
Dryer Makes Unusual Noises
Strange sounds emanating from your Frigidaire dryer demand investigation․ Squealing often indicates a worn drive belt or idler pulley – replacement is usually straightforward․ Grinding noises suggest worn drum rollers or a failing motor bearing, potentially requiring professional repair․
Thumping sounds can stem from items trapped inside the drum, or unbalanced loads․ Always disconnect power before reaching inside! Clicking noises might point to debris caught in the blower wheel․ Regularly cleaning the lint filter and vent duct helps prevent obstructions and noise․ Ignoring unusual sounds can lead to more significant, costly repairs․
Error Codes & Diagnostics
Decode flashing lights and error messages! Consult page 118 of the manual for code definitions and utilize diagnostic tests on page 116․
Decoding Error Codes (Referencing Page 118 of Manual)
Understanding the language of your Frigidaire unit begins with its error codes․ Page 118 of the technical service manual is your key to deciphering these signals․ These codes aren’t random; they pinpoint specific issues within the washer or dryer․ For example, a repeating beep sequence, like the three beeps mentioned for model FFLG4033QT0, indicates a problem requiring investigation․
The manual details each code’s meaning, helping you narrow down the source of the malfunction․ Don’t ignore these signals! They can prevent minor issues from escalating into costly repairs․ Carefully note the sequence of lights or beeps, then cross-reference it with the manual’s chart․ This proactive approach empowers you to address problems efficiently and potentially avoid a service call․
Remember, accurate code identification is crucial for effective troubleshooting․
Running Diagnostic Tests (Page 116 of Manual)
Unlock deeper insights into your Frigidaire’s performance with built-in diagnostic tests․ Page 116 of the technical service manual guides you through initiating these tests, allowing you to assess various components without disassembly․ These tests systematically check the washer and dryer’s functions, identifying potential faults in the control board, motor, or sensors․
Following the manual’s instructions precisely is vital for accurate results․ The diagnostic mode will often cycle the machine through a series of operations, displaying error codes or indicators if a problem is detected․ This is a powerful tool for pinpointing issues that aren’t immediately obvious․
Remember to document any error codes displayed during the test for further investigation and potential parts replacement․

Specific Dryer Issues
Addressing unique dryer problems is key to restoring functionality․ We’ll explore blinking lights, heating failures, and drum malfunctions for optimal performance․
Dryer Light Blinking Red 9 Times, Then Green
This specific error code sequence indicates a potential venting issue or incomplete washer spin cycle․ The flashing red lights, followed by green, signal the dryer isn’t functioning correctly․ First, and crucially, disconnect the vent hose completely and run a test load․ This isolates whether a blockage is the root cause․
A restricted vent hose prevents proper exhaust, triggering the error․ Simultaneously, ensure the washer is adequately spinning out water before transferring clothes․ Excess moisture can overwhelm the dryer’s heating system․ If the problem persists after checking the vent and spin cycle, further diagnostics may be needed, potentially involving the thermal fuse or heating element․ Remember safety first – always disconnect power before any inspection!
Vent Hose Obstruction Check
A clogged vent hose is a frequent culprit when the dryer displays the red 9/green blink error․ Begin by carefully disconnecting the vent hose from the back of the dryer․ Visually inspect the entire length for lint buildup, crushed sections, or any other obstructions․ Use a vacuum cleaner with a hose attachment to thoroughly clear any accumulated lint․
Ensure the external vent opening is also free from debris like bird nests or snow․ A restricted airflow prevents proper drying and can trigger overheating protection, causing the error code․ Running the dryer with a completely removed vent hose (for a short test) will confirm if the vent is the sole issue․ Replace damaged vent hoses immediately․
Proper Washer Spin Cycle Completion
The dryer relies on the washer to effectively remove water from clothes during the spin cycle․ If the washer doesn’t spin adequately, the dryer will struggle and may display error codes․ Ensure you aren’t overloading the washer, as this hinders proper spinning․ Select the appropriate spin speed setting for the load type – heavier items require higher spin speeds․
Verify the washer is level; an unlevel machine can disrupt the spin cycle․ After a wash cycle, manually check the clothes for excessive dampness․ If they remain very wet, investigate potential washer issues like a clogged drain pump or a faulty lid switch preventing the spin cycle from engaging․
Dryer Not Heating
A dryer failing to heat is a common issue, often stemming from a few key components․ First, check the thermal fuse – a safety device that blows if the dryer overheats; A blown fuse needs replacement․ Next, inspect the heating element for breaks or damage; continuity testing is crucial․ The gas valve (for gas dryers) or the igniter may also be faulty, preventing gas flow to the burner․
Always disconnect power before inspecting these parts! A malfunctioning thermostat can also cause heating problems․ If you’ve checked these components and the dryer still won’t heat, a control board issue might be present, requiring professional diagnosis․

Washer Specific Issues
Addressing washer-only problems, this section details solutions for detergent residue, incomplete draining, and ensuring proper agitation for effective cleaning performance․
Detergent & PODS Residue on Clothes
Experiencing detergent or POD residue on your freshly washed clothes can be frustrating․ Several factors contribute to this issue․ Overusing detergent, especially High Efficiency (HE) detergent in a non-HE machine, is a primary cause․ Using too many laundry PODS, or not dissolving them properly, also leads to residue․
To resolve this, reduce the amount of detergent used – less is often more! Ensure you’re using HE detergent if your machine requires it․ For PODS, consider placing them directly into the drum instead of the dispenser․ Run an empty wash cycle with hot water and a cup of white vinegar to help dissolve built-up residue within the machine․ Regularly cleaning the dispenser drawer is also crucial for preventing buildup․
Proper water temperature and load size also play a role․ Cold water may not fully dissolve detergent, and overloading the washer hinders effective rinsing․
Washer Doesn’t Drain Completely
A Frigidaire washer failing to drain completely is a common issue with several potential causes․ The most frequent culprit is a clogged drain pump filter․ This filter traps lint, debris, and small objects, preventing proper water flow․ Another possibility is a kinked or blocked drain hose, restricting the water’s exit path․
To address this, first, disconnect power and locate the drain pump filter (refer to your manual for its exact location)․ Carefully remove and clean the filter, removing any obstructions․ Next, inspect the drain hose for kinks or blockages, straightening or clearing them as needed․
If the problem persists, the drain pump itself might be faulty and require replacement․ A less common cause could be a clogged drain line within the plumbing system․

Maintenance & Prevention
Regular upkeep extends your Frigidaire’s life! Clean the lint filter, inspect the drive belt, and check the lid switch for damage routinely․
Regular Cleaning of Lint Filter
Maintaining a clean lint filter is paramount for optimal dryer performance and safety․ A clogged filter restricts airflow, leading to longer drying times, increased energy consumption, and potentially, a fire hazard․ After every load, meticulously remove lint from the filter – don’t just rely on the dryer’s automatic cleaning cycle․
Inspect the lint filter housing itself periodically for any accumulated lint that may bypass the filter․ Use a vacuum cleaner attachment to thoroughly clean the housing․ A buildup here can significantly reduce efficiency․ Furthermore, consider occasionally washing the lint filter with warm water and mild detergent to remove any fabric softener residue that might coat the mesh, hindering airflow․ Remember, a clean lint filter isn’t just about convenience; it’s a crucial safety measure!
Checking & Replacing Drive Belt
A worn or broken drive belt is a frequent cause of a dryer drum that won’t turn․ To inspect the belt, always disconnect power to the unit first! Access typically requires removing the dryer’s access panel․ Visually examine the belt for cracks, fraying, or signs of wear․ If the belt appears damaged, it needs replacement․
Replacing the drive belt involves carefully maneuvering the new belt around the drum and motor pulley․ Refer to your technical service manual (page 116) for specific instructions tailored to your model․ Ensure the belt is properly seated and tensioned before reassembling the dryer․ A loose belt will slip, while an overly tight belt can damage the motor․ Safety first – disconnect power before any maintenance!
Inspecting Lid Switch for Damage
A malfunctioning lid switch can prevent the washer from spinning or even starting a cycle․ Begin by disconnecting power to the unit․ Locate the lid switch – usually found under the washer lid housing․ Visually inspect the switch for any physical damage, such as cracks or broken parts․
Testing the lid switch with a multimeter is crucial․ A continuity test will reveal if the switch is functioning correctly․ If the switch fails the test, replacement is necessary․ New lid switches are readily available․ Ensure the replacement part is compatible with your Frigidaire model (FFLG4033QT0)․ Proper installation is key for safe and reliable operation․

Safety Precautions
Prioritize safety during repairs! Always disconnect power before any work, ensure proper ventilation, and avoid overloading the washer or dryer to prevent damage․
Disconnecting Power Before Repair
Crucially, before initiating any repair or maintenance procedures on your Frigidaire stacked washer dryer, completely disconnect the unit from its power source․ This is a non-negotiable safety precaution designed to prevent electrical shock and potential damage to the appliance’s internal components․ Locate the power cord plug and remove it from the wall outlet․
If the unit is hardwired, switch off the corresponding circuit breaker in your home’s electrical panel․ Double-check with a voltage tester to confirm that no power is reaching the appliance․ Ignoring this step poses a significant risk․ Always verify power is off before touching any internal parts․ This simple act dramatically reduces the chance of injury and ensures a safer repair process․ Remember, safety first!
Proper Ventilation Requirements
Maintaining adequate ventilation is paramount for the safe and efficient operation of your Frigidaire stacked washer dryer, particularly the dryer component․ Restricted airflow can lead to overheating, posing a fire hazard and diminishing drying performance․ Ensure the vent hose is not kinked, crushed, or excessively long – ideally, it should be rigid metal and as short as possible․
Regularly inspect the vent hose for lint buildup and obstructions․ Clean it thoroughly at least annually, or more frequently with heavy use․ The vent should terminate outdoors, away from windows, doors, and air intakes․ Proper ventilation ensures moisture is effectively expelled, preventing mold growth and maintaining optimal dryer function․
Avoiding Overloading Washer/Dryer
Overloading either the washer or dryer significantly impacts performance and can cause damage․ In the washer, exceeding the recommended load capacity prevents proper agitation and rinsing, leaving clothes soiled and potentially causing strain on the motor and suspension․ For the dryer, overcrowding restricts airflow, leading to longer drying times, increased energy consumption, and potential overheating․
Consult your Frigidaire stacked unit’s manual for specific load size guidelines․ Generally, clothes should move freely within the drum․ Avoid packing items tightly․ Overloading can also contribute to excessive wear and tear on components, shortening the appliance’s lifespan․

Parts & Resources
Finding replacement parts and repair advice is crucial for maintaining your Frigidaire unit․ Explore online retailers, forums, and Frigidaire’s official support channels․
Locating Replacement Parts
Securing the correct replacement parts is vital for a successful repair․ Begin by identifying your Frigidaire stacked washer dryer’s precise model number – typically found on a label inside the door or on the back panel․ This number is essential when searching for compatible components․
Several online retailers specialize in appliance parts, offering a wide selection of Frigidaire-specific items․ Websites like AppliancePartsPros, RepairClinic, and Sears PartsDirect are excellent starting points․ Always double-check the part number and compatibility before ordering․ Local appliance repair shops can also source parts, potentially offering faster turnaround times․
When ordering, consider the part’s warranty and return policy․ Genuine Frigidaire parts are generally recommended for optimal performance and longevity, though aftermarket options can be more affordable․ Remember to factor in shipping costs and delivery times when making your decision․
Online Repair Advice & Forums
Facing a tricky repair? The internet offers a wealth of resources and support․ Numerous online forums and communities are dedicated to appliance repair, specifically Frigidaire models․ These platforms allow you to connect with experienced DIYers and professionals, sharing troubleshooting tips and solutions․
Websites like ApplianceForum․com and DIYHomeWarranty․com host active discussions and detailed repair guides․ YouTube is also a valuable resource, with countless videos demonstrating repair procedures․ When seeking advice, provide your model number and a clear description of the problem․
Remember to exercise caution when following online advice and prioritize safety․ Always disconnect power before attempting any repairs․ Cross-reference information from multiple sources and consult a qualified technician if you’re unsure about any step․